Set it up
This is the easiest way to use earmark. Your library is a GitHub repo. You list what you want to hear in one file, sources.yml. When you commit a change to that file, earmark dictates the new entries and updates your podcast feed.
You need a free GitHub account. You do not install anything, you do not pay for a sync service, and you do not run any commands. You set it up once, in four steps.
1. Make your repo from the template
Open earmark-dev/library-template and click Use this template → Create a new repository. Give the repo a name and make it public.
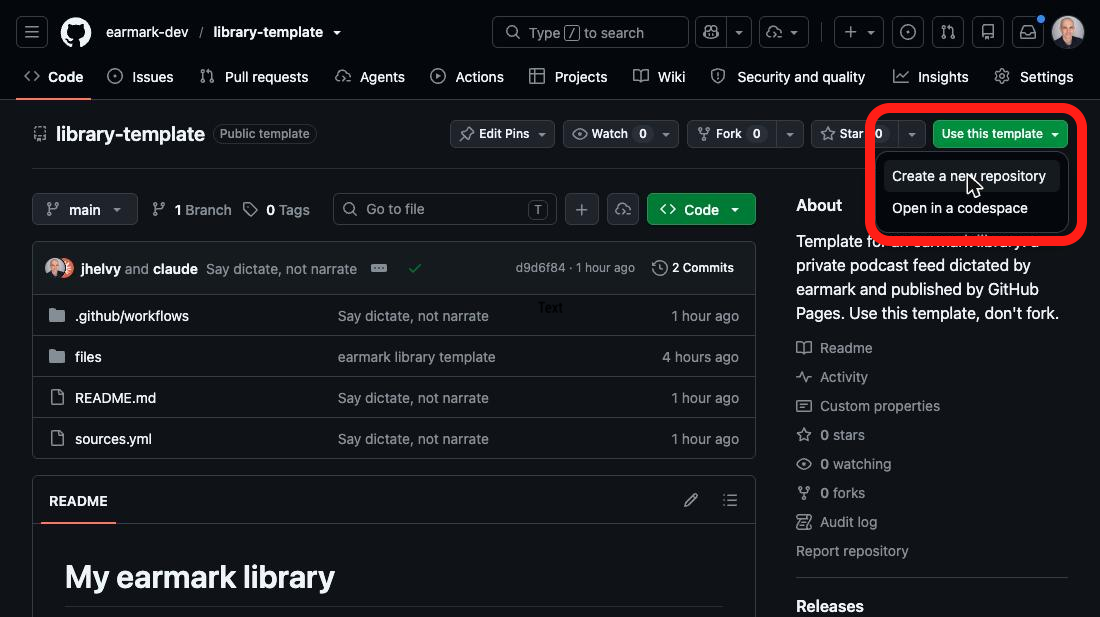
2. Turn on GitHub Pages
In your new repo, open Settings → Pages. Set Source to Deploy from a branch, branch main, folder / (root), then click Save.
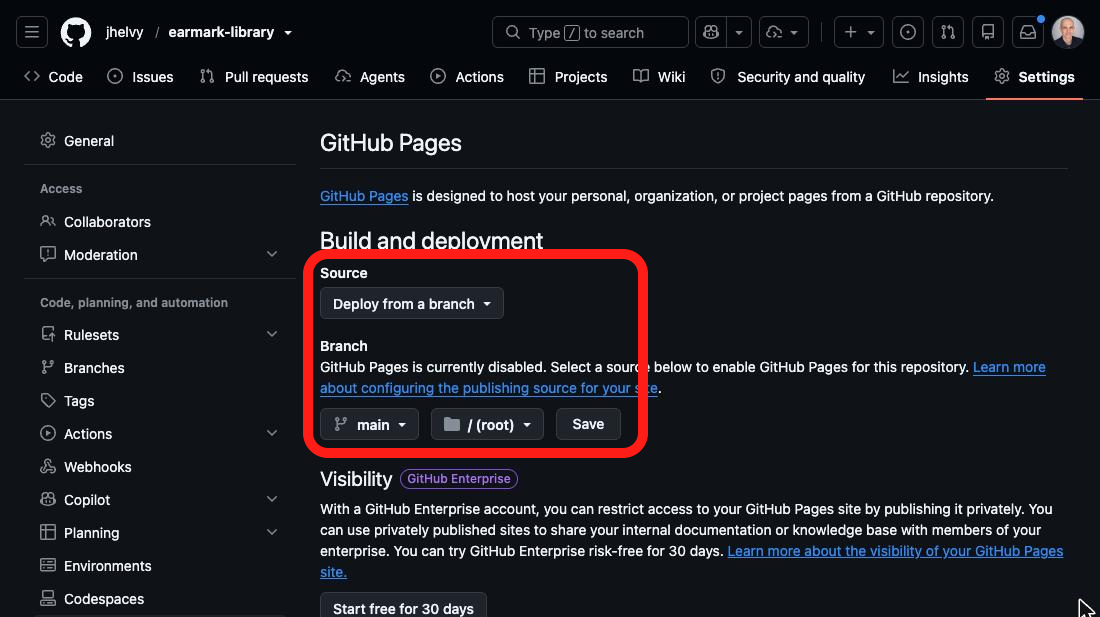
3. Check that the first run finished
Making the repo started a first run by itself. It creates the library settings and an empty feed, and takes about a minute. Open the Actions tab and select earmark on the left. The run shows a green check when it is done.
If there is no run, click Run workflow → Run workflow to start one.
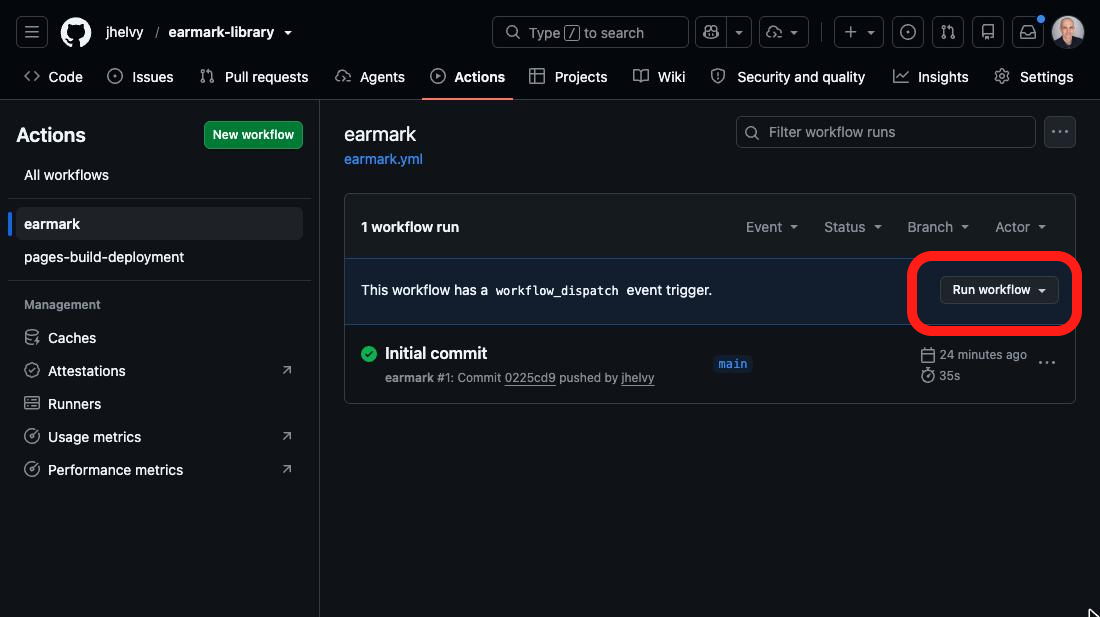
4. Copy your feed URL
Click the finished run, then scroll down to publish summary. It shows your feed URL, which looks like https://<you>.github.io/<repo>/feed.xml.
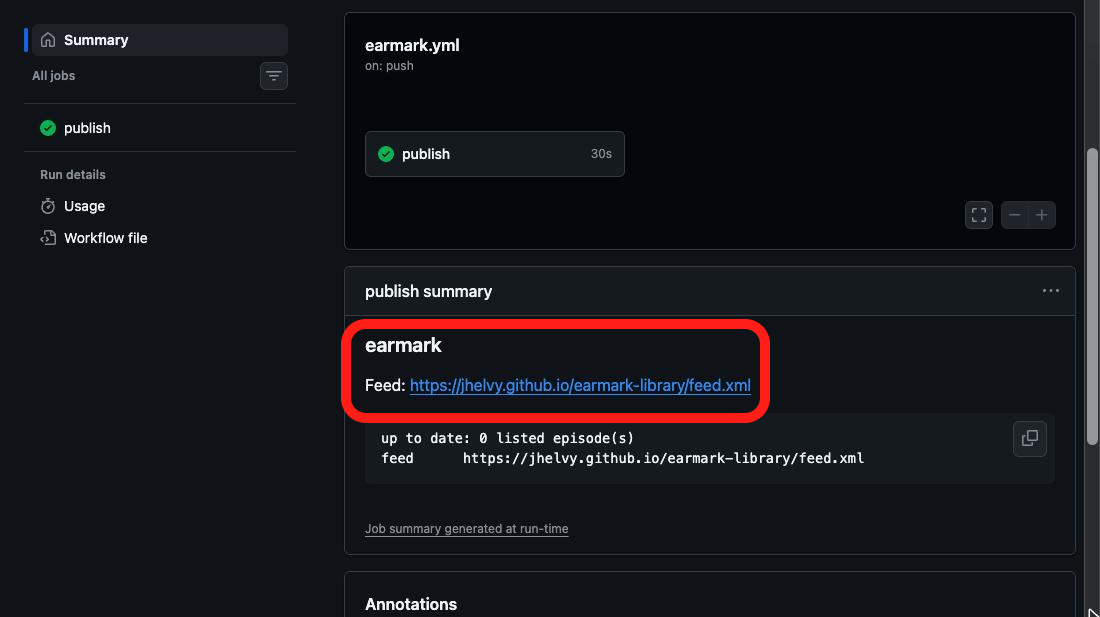
Next, subscribe to that URL in your podcast app, then add something to listen to.
Use the Action in another repo
The template is one workflow file that calls the earmark Action. You can add the same file to any repo:
# .github/workflows/earmark.yml
on:
  push:
    paths: [sources.yml, "files/**", "audio/**", earmark.toml]
  workflow_dispatch:
permissions:
  contents: write
concurrency:
  group: earmark
jobs:
  publish:
    runs-on: ubuntu-latest
    steps:
      - uses: actions/checkout@v6
      - uses: earmark-dev/earmark@v1
        # with:
        #   base-url: https://audio.example.com   # for a custom domain
        #   title: My Reading Pile
base-url and title apply only to the first run. After that, change them in earmark.toml.